Подписывайтесь на мой инстаграм - https://instagram.com/anna.kovaaleva?...
ENGLISH VERSION - • HOW TO MAKE A STEM AND STAND FOR A BI...
ПОШАГОВЫЙ ВИДЕО-МК "СТЕБЛИ И ПОДСТАВКИ ДЛЯ РОСТОВЫХ ЦВЕТОВ" - • СТЕБЛИ И ПОДСТАВКИ ДЛЯ РОСТОВЫХ ЦВЕТО...
Виды бутонов.
Я подразделяю бутоны на плоски и объемные, съемные и не съемные.
Плоские я формирую на картонный круг. Диаметр его может быть разный!Я часто пользуюсь диаметром 25-30 см. и получаю на выходе цветок от 60см. и более.
Объемные бутоны я формирую на обычную пластиковую трубу!
Техника 1. Не съемный бутон. Плоский цветок.
После того, как сформировали плоский вид бутона, нам необходимо его прикрепить на стебель. Для этого изготавливаем картонное крепление по видео. Очень хорошо заливаем клеем. Не жалеем. Клей застынет и станет силиконовой массой, которая очень прочно будет держать бутон у стебля!
Техника 2. Съемный бутон. Объемный цветок.
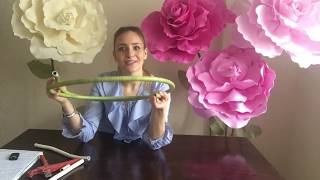
Нам необходимо сформировать бутон на трубку, которая будет надеваться на металлопластиковую трубу, являющейся стеблем цветка.
Для стебля из металлопластиковой трубы диаметром 16мм., подойдет пластиковая труба размер - 25.
Для стебля из металлопластиковой трубы диаметром 20мм., подойдет пластиковая труба размер - 32.
Техника 3. Съемный бутон. Плоский цветок.
Для того, чтобы сделать цветок на плоском основании съемным, нам необходимо совместить технику 1 + технику 2.
Я пользуюсь данными техниками более 3х лет, ни одна не подвела. Прекрасно подходят для цветов, чьи бутоны весят не более 2кг.
Творите на радость! Остались вопросы? смело пишите их в комментариях!
Подписывайтесь на канал и на страничку в инстаграм - https://instagram.com/anna.kovaaleva?...
__________________________________________________
Step-by-step VIDEO-MK "STEPS AND STANDS FOR GROWTH FLOWERS" - • СТЕБЛИ И ПОДСТАВКИ ДЛЯ РОСТОВЫХ ЦВЕТО...
Types of buds.
I am separating the buds on the flat and three-dimensional.
Flat such as: chamomile, succulent, cotton, Orchid, peony, poppy, plumeria, Narcissus I form on a cardboard circle. Its diameter can be different! The larger the flower in diameter, the larger the circle. I often use a diameter of 25-30 cm and get a flower from 60 cm. and more.
Surround the buds, such as rose of Tamarana and paper, Tulip, I form the usual plastic tube! It and nucleobase petals.
Next, I divide the buds into removable and not removable. In my works I make mostly removable buds from the stem, as it is very convenient in transportation and storage. Non-removable buds are made when the flower is needed is not a large size, for example, no more than 50cm. in length, or make a flower-lamp! In these cases, the petals are wound on the tube itself, which is the stem of the flower.
Technique 1. Not removable Bud. Flat flower.
Once formed a flat kind of Bud, we need to attach it to the stem. To do this, we make a cardboard mount on video. Take a cardboard rectangle and turn it into a tube on the diameter of the pipe. Glue it so it doesn't spin. Try on the tube, and mark the place on the cardboard to where we insert it into the tube. Pull. and to this border cut the cardboard tube into 2 or 3 parts. Push the cut pieces apart. Now glue the cardboard tube to the cut part and insert into the tube. Then glue the cardboard circle to this mount. Very good pour glue. No regret. The glue will harden and will be a silicone material that is very durable will keep the Bud from the stem!
Technique 2. Removable Bud. Surround the flower.
We need to form a Bud on the tube, which will be put on the plastic tube, which is the stem of the flower.
For a stem from a metal-plastic pipe with a diameter of 16 mm., suitable plastic pipe size-25.
For a stem from a metal-plastic pipe with a diameter of 20mm., suitable plastic pipe size-32.
Technique 3. Removable Bud. Flat flower.
In order to make a flower on a flat base removable, we need to combine technique 1 + technique 2. Cardboard we are going to fix on plastic pipe, matching the stem. It is important when using this technique, you take a plastic pipe, no longer than 10cm.
5 see in the tube You will have to take the place of the cardboard mount, and 5 to put on the metal pipe. Otherwise, a plastic pipe of greater length will not withstand the cardboard mount and break.
I use these techniques for more than 3 years, none failed. Great for flowers from tameran, izolon. For flowers whose buds weigh no more than 2kg.
Create for joy! Any questions? feel free to write them in the comments!
Subscribe to the channel and instagram page - https://instagram.com/anna.kovaaleva?...


Информация по комментариям в разработке