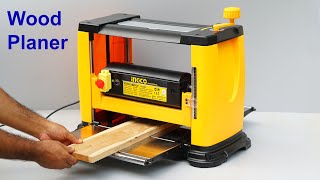
We needed to upgrade the thickness planer in our workshop and chose the DeWalt® DW735. It’s been a great choice because the controls are intuitive and the results are impressive!
#woodplaner #woodworking
Buy your DFJ T-Shirt, Cap, or Coffee Mug at https://www.dirtfarmerjay.com/shop
We love our DeWalt® DW735 13” (330mm) wood planer. It’s a great machine with good features, excellent serviceability, and comfortable controls.
Not only do we get great results with the machine, but the controls and features on the unit are intuitive and easy to use with a minimum of fuss.
To start with, the power switch is right up front, along with a reset switch. The on/off switch is a red paddle, very easy to see, and easy to shut off with a bump or swat of the hand. Ergonomically, it is right where it should be.
The depth of cut indicator is a cool feature that lets you know if the amount of stock you are getting ready to plane off is safe to do so for the width of the stock. It took me a few minutes to understand the chart and what the indicator is telling you. The basic idea is that you can take off more on a single pass on a narrow board than you can on a wide one. That much is a no-brainer, but the indicator makes the amount of stock removal that is safe and not hard on the machine to a more precise setting.
This planer also sports a final thickness turret. Our unit is very accurate, and as long as the planer is set “higher” than the turret measurement, you can bring the planer head down in steps until your final set thickness is attained. Common thicknesses can be chosen on the turret, and when that setting is reached, the adjustment wheel on the unit stops. Very nice!
Another great feature is the two-speed control that slows down (or speeds up) the feed rollers, hence the feed rate. The lower setting creates 96 cuts per inch (25mm), and higher 179 cuts per inch (25mm). Again, the difference is accomplished via speed changes in the rollers, not in the cutter head rotation rate.
The planer depth of cut indicator/gauge is one of the better ones we’ve seen on compact planers. The indicator is bright red, and the scale has a yellow background with a black rule with sizable numbers. To make use of it, you need to kneel down until your eye level is even with the top edge of the indicator. Otherwise, you won’t get an accurate reading. When your eye isn’t level with the top edge of the indicator, you will get a parallax error.
Because of this, we ultimately decided to install a digital Wixey gauge. You can see our review and installation at:
COMING VERY SOON!
One other thing that we feel is worth mentioning is the height adjustment wheel itself. It’s beefy, better than the typical crank handle we’ve seen, and each rotation equals 1/16” (about 2mm) in raise or lower distance. Raise and lower direction arrows are embossed on the wheel spokes, but it’s better to memorize the rotation directions. My memory cue is thinking about the joystick or yoke in an airplane or flight simulator. If the joystick is pushed forward, the plane descends. If the joystick is pulled back, the plane ascends. So, using the top edge of the wheel, standing on the feed side of the machine, and rolling the top down/away makes the cutter head descend, and rolling the top up/towards you makes the cutter head descend. It works for me.
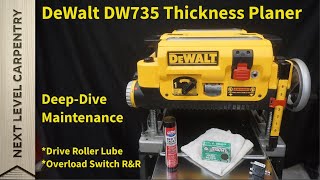
Access to the interior of the machine is simple with the loosening of the 4 screws on the top using the provided onboard t-wrench. The wrench works both for top access and for changing the blades.
To access the cutter head or the fan-assisted chip ejection system after removing the top, simply remove the brightly colored post-type fasteners and remove the chip ejection shroud. You now can see the cutters and access them. Of course, the machine should ALWAYS be unplugged when servicing the machine.
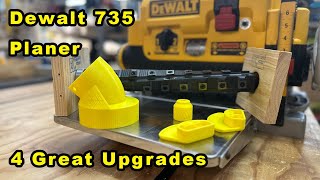
Parts are readily available, and there are after-market and factory accessories that you may want to check out. We installed the optional in and outfeed tables. These shouldn’t be optional in our opinion. We also bought the DeWalt® rolling stand. It’s well made and we think its a good value.
You can watch our unboxing and assembly of the planer stand at:
COMING SOON!
We have also purchased the Shelix helical planer head and will be installing it and showing the finish differences and sound level contrasts between the stock and helical head.
Bottom line? For the capacity, accuracy, finish, and quality of the machine, we feel our money was well spent.
JUST DO IT YOURSELF!
Buy your DFJ T-Shirt, Cap, or Coffee Mug at https://www.dirtfarmerjay.com/shop


Информация по комментариям в разработке