Click for more info and reviews of this Thule Roof Rack:
https://www.etrailer.com/Roof-Rack/Th...
https://www.etrailer.com
Don’t forget to subscribe!
/ etrailertv
Full transcript: https://www.etrailer.com/tv-install-t...
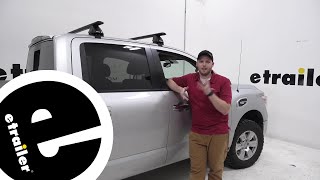
Hey, guys, today we have a 2015 Nissan Rogue and we're going to do a test of the Thule square bar crossbar roof rack system. Now, this roof rack system is going to mount to the raised side rails of your Rogue and it's going to allow you to get your favorite accessories on top of your roof, whether you've got a bike rack, a kayak carrier, or even a cargo box. The carrier with the square bar design is going to have a more rugged look to it, so it might have a bit more wind noise and drag when compared to the wing bar setup, which is a more aerodynamic shape, but you're going to have that more rugged, outdoorsy look which is sometimes favorable, depending on the person that is putting it on their Rogue.Now, it's made up of a couple of different parts. We have our 47-inch square bar crossbar up top. The square bars have been redesigned by Thule, instead of having a foot pack that comes around the top and crimps it right there, we're actually going to have a track, right here, just like in the wing bars, to where we can slide our foot pack in, and then it's going to attach down from there. It's also going to lock inside the track.Now, down below what's connecting our crossbar to our raised side rail is going to be our Evo raised rail foot.
I just took the end cap off. We see we have our tightening bolt right here, which is what tightens it down onto the raised side rail, but at the same time when you tighten it down to the side rail it's also going to tighten down the lock on the inside of the channel to make sure that the crossbar cannot slide back and forth. I'm going to put the cap back on, you're going to see we also have these pop locks, which you can replace with Thule lock cores, which we do sell separately here at E-trailer, and that will just give more security to your roof rack so no one can remove it without that key. In the bottom part of our foot pack, they're also going to have a nice rubber coating to them so that it doesn't harm or scratch the finish of your raised side rails.Now, I'll go ahead and give you a couple clearance measurements. First, from the top of our roof to the bottom of our square bar is going to be 2 5/8 inches, which is more than enough space to gain any of your clamp-on accessories around and under the crossbar without risking harming the finish of your roof.
Now from the top of our roof to the top of our crossbar, that's going to be 3 1/2 inches, and that's something you want to keep in mind because that's how much you've added to the height from your roof up to here, which, of course, is important for low clearance situations.Now, we're also going to have a 220 pound weight capacity on our roof rack, which is a step up compared to a lot of other ones out there, but keep in mind you want to double check with your Rogue's owner's manual to make sure your roof can handle all that weight. Now that we've gone over some of those features, let's show you how it installs.Now I consider this is going to be a bit easier to assemble and install on your roof, because we don't have to deal with any of the fit kit hooks and pads, we just have to deal with the crossbar and our raised rail feet. All we're going to do is flip it over, take our end cap off, we'll grab our raised rail foot, come over and insert this piece into the channel, all the way. You want to make sure it's loose, like so, put our end cap back on and then we're ready to put it on our roof.Now, when putting it in place on your roof, it doesn't really matter which way you put it, it's going to look the same either way. We'll just stretch it over, get it over that cross bar.
We'll want to scoot it back to in between those two markers and we'll come right here. Now we're going to measure our crossbar spread, it's going to be from the front of our back square bars to the front of our front square bar. There's no set measurement, you just want to make sure it's over 24 inches. Sometimes I'll just base it off of whatever accessory I might be hauling that day, you just want to get a nice, round number. Then once you have that complete we can begin tightening it down.
Now, when tightening it down, I always like to start with pushing my foot all the way and trying to get it as flush with the side rail as possible. You see, there's a little bit of a gap right there, so we're just going to push like that, get rid of that space, and we'll tighten it down with our hand as far as we can go. Once you get as far as you can with your hand just take your included tightening tool and tighten it down the rest of the way.Once you hear those audible clicks, you're going to know it's tight enough, and then once you'v


![[4K FULL HD] Relaxing Water Background | 1 HOUR | Calm Water Wallpaper (No Sound)](https://i.ytimg.com/vi/y9PTNTSpGJs/mqdefault.jpg)

Информация по комментариям в разработке