How To Apply Motorcycle Decals & Clear Coat | Honda CBR900RR Fireblade Sticker Kit Installation | 14
In this episode I put the motorcycle decals on the tank and side panels of my CBR900RR project bike, then spray them with a clear coat over the top.
Here’s what I use for the Fireblade decal application in this video:
Ani F160 Spray Gun: https://ebay.us/82yZm4
150L Compressor: https://ebay.us/xxiVq8
Kapci 6030 2K HS Anti-Scratch Clearcoat with 6033 hardener 1.5L : https://ebay.us/giUv5x
1200 Wet & Dry paper: https://ebay.us/PWRC2N
Adhesion promoter spray: https://ebay.us/qUhZTU
Hot air gun, I got mine from Lidl but this is the same: https://ebay.us/4YL6WV
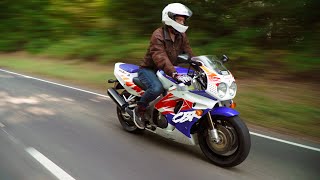
When I got this Honda bike it had previously been painted all black with no sticker kit installed. I think it was a single stage paint, possibly 2k, but it had the colour and clear all as one rather than basecoat then clear over the top. When it was clean and had been polished it was great, but it soon dulled off and looked a little tatty. The paint marked quite easily so you had to be careful getting on and off, it was extremely soft paint.
I was also given two sets of Fireblade decals with the bike. One was the original yellow type for this 1996 bike, but the other was the same design but with gold where the yellow would have been. So a custom motorcycle vinyl graphic sticker kit for CBR900RR.
The wheels had been powder coated gold as well so I felt the gold stickers would be a classy look.
Rather than paint all of the panels from scratch I decided to wet sand what was there, apply the bike decals then spray a good quality clear coat over the top. I checked that the Kapci clear coat I purchased wouldn’t react with the black paint by trying a test patch on the front mudguard/fender first, and it was perfect.
I was still concerned that putting the decals on and clear coating might turn into a disaster, so I decided to do it in two stages. First I would do the tank and side panels, and if this was successful I would do the rest of the fairing stickers at a later date. If it did turn into a disaster I could paint the tank and side panels black again but give them a better clear coating so they didn’t scratch as much in future.
For the wet sanding preparation for sticker installation I used a very light sandpaper, 1200 grit, usually I would go with 800 or 600, but I wasn’t sure how thick the paint was and I didn’t want to go through it. There were some defects in the previous paint job, such as fisheyes. I decided that I wasn’t going to try to fix all of these though fear of sanding too deep, but wanted to improve them as much as I could. I didn’t want to turn this into a job that kept the bike off the road for too long as the riding weather was on the horizon in the UK. The wet sanding worked very well, luckily.
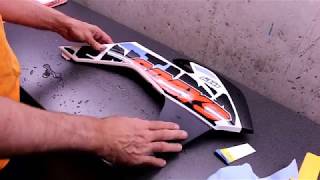
Appyling motorcycle decals on takes some time, and requires a lot of patience. Using soapy water, and an appropriate heat gun made the result come out great. I took my time and worked the air bubbles out from beneath the stickers using a squeegee or a spudger.
The soapy water actually allows for positioning adjustments when installing decals, which is extremely useful. The stickers I used have been sat for a long time so they were quite stiff and wanted to stay on the backing paper.
The heat gun allows you to make the stickers conform to the curved shape of the tank and fairings more easily.
When I started to clear coat it was a reasonably dull but warm(ish) day. But when I got onto the second and third coat it became quite sunny. I should have stopped as I know clear coating in full sun never works out well. The paint dries a little coming out of the gun and you get more orange peel and trash in the finish. Ho hum.
At first I was disappointed but this actually turned out to be for the best. It spurred me on to flow coat the tank and panels by giving them another wet sand and clear coat over again, but this time having put up a gazebo to protect them from the sun. I did this a couple of days later, having allowed the clear to harden first. This techique can be used to give extra thick clearcoat on a paint job, allowing for more sanding and polishing later to get a flawless finish.
The second clear coating worked really well, it came out with very little orange peel and nibs. I left it for a day or so to harden, then I put it back on the bike. It made it look amazing, and I was really inspired to get on with the fairing, but you will have to wait for the next episode to see when I did them.
For more helpful how-to guides and restoration project logs, visit our blog: https://www.spannerrash.com/
As an Amazon Associate, Ebay Partner and Awin Affiliate, we earn a small commission from qualifying purchases. Some of our links are affiliate links, and if you decide to purchase things through them, we earn a small commission. It costs you nothing but helps us to keep the content coming. Thanks for your support!


Информация по комментариям в разработке