Is it possible to adapt a thick crust pizza in a pan to conditions which are designed for thin crust pizza cooked directly on stone? Let's find out...
Table of Contents:
00:00 Intro
01:58 Starting the dough
02:57 Adaptation
03:47 Kneading the dough
04:50 Ingredients
05:40 Stretch & Fold
06:15 Oiling the pan
06:45 1st stretch
07:10 Making the sauce
07:45 2nd & 3rd stretch
08:32 Home oven setup
09:31 Topping
10:20 Cooking
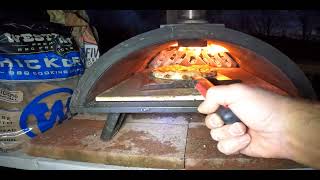
11:02 Wood oven setup
12:10 Cooking
13:42 Appearance and tasting
16:21 Wood oven setup redux
17:43 Tasting 2
19:07 Tasting 3 / Outro
----------------
Recipe makes 1 pizza of 10” x 14” (25 x 36 cm) dimensions, the classic large Detroit pizza pan.
For the dough:
314g flour, bread (100%)
6g yeast, instant (2%)
10g salt (3%)
Mix all together in a stand mixer bowl until combined.
250g water (80%)
Add water and mix until ingredients just come together in a shaggy mass, ensuring there are no dry patches left in the bottom of the bowl. Cover and let rest for 20 mins. After the resting period, mix on medium-low speed for 8 minutes (or knead for 10-12 mins if kneading by hand) Once the dough ball is smooth and elastic, place into a bowl and cover. Let rest for 30 mins, then perform a stretch and fold. Let rest again until the dough has roughly doubled in size, approximately 1-2 hours depending upon the temperature of your kitchen. You can place it in a warm place to accelerate the fermentation process if desired. While waiting for the dough to rise, you can prep the other components.
For the sauce:
1 x 400g can tomatoes
15ml olive oil
1 tsp dried oregano
¼ tsp garlic powder
½ tsp salt
Pinch of chili flakes
A few cracks of black pepper
Sugar, optional, as needed (if tomatoes are not fully ripe)
If using whole or chopped tomatoes, blend briefly with an immersion blender. Try not to blend too much; you want some texture, not a smooth puree. Cook at a simmer for 30 minutes until sauce is reduced and thick, but not too dry.
For the toppings:
350 cheese, grated
If you can get Wisconsin brick cheese, use it. If not, try a ½ and ½ combination of low moisture mozzarella and any mild, creamy variety, such as Monterrey jack, gouda, havarti, edam or colby.
Toppings of choice
Pepperoni is the classic topping and my clear favorite, but anything you want is fine, including no toppings. Be sparing. The dough/cheese/sauce ratios are key to a good finished product and overloading the pizza with toppings will throw off the cooking time and flavor profile.
For the pizza:
Preheat the oven to its highest temperature (when using your home oven). Use a setting that focuses on the bottom element and ideally the fan as well. You want lots of bottom heat and good airflow to get a crisp crust and browning on the top. Place one oven rack on the lowest level and another on the highest or second highest level.
Pour a tablespoon of oil in the pan. Spread evenly on the bottom and sides. Punch down the fully risen dough and form into a ball. Place the dough ball into the oiled pan. Oil your fingers. Press down on dough with fingers and start spreading it out. You won't be able to get it all the way to the edges yet; this is okay. Spread it as much as you can without tearing, then set aside for 10-15 minutes to allow the dough to relax. Return to dough and stretch it out again. It might reach the edges this time. If not, let it rest a little more and try again until the dough is fully pushed up around the sides and into the corners.
To top the pizza, start with the cheese. Spread it evenly all over the dough, pushing it gently up the sides and corners of the pan to ensure some will melt down the sides of the dough. Place your toppings evenly on top of the cheese. Spoon sauce in blobs all over for full coverage, but don't spread out in an even layer. You want dry patches to allow for steam to escape.
For the home oven: Bake for 10 mins on the lower rack. Take out and place on the higher rack, rotating the pan at the same time. Bake another 8-10 mins or until edges start to blacken slightly. If toppings have not reached the desired browning amount, you can broil (grill) the top for a minute or two.
For the wood-fired oven: Using a wood-fired oven is less precise, so some experimentation will be required to dial this in. Preheat the oven for at least an hour, but don’t get too hot. You want to be cooking with rising heat so that you have a bit more control. The deck temperature should be about 250°C (480°F) and the air temperature about 300°C (575°F). Try to maintain this throughout the cook. Either way, rotate the pan regularly to ensure even cooking. Expect a 15-20 minute total cooking time.
Once cooked, take out of the oven, let sit in the pan for 2-3 mins to let the toppings settle and firm up a bit, then slide out of the pan onto a cooling rack for a further 5-10 mins before slicing and eating.


Информация по комментариям в разработке