Click for more info and reviews of this Rear View Safety Backup Camera:
https://www.etrailer.com/Backup-Camer...
Check out some similar Backup Camera options:
https://www.etrailer.com/dept-pg-Back...
Search for other popular Chevrolet Traverse parts and accessories:
https://www.etrailer.com/vehicle/2011...
https://www.etrailer.com
Don’t forget to subscribe!
/ etrailertv
Full transcript: https://www.etrailer.com/tv-install-r...
Speaker 1: Today in our 2011 Chevrolet Traverse we're going to be taking a look at, and showing you how to install the rear view safety G-series backup camera, part number RVS-776718-DOS. So here's what our backup camera system looks like. I's going to replace our factory mirror, and we're going to have a built in color digital display. Now the mirror Not only is going to look a lot like our factory mirror, but it's also going to have a lot of the same features. It has an auto dimming feature so when we're driving at night, drivers behind us won't blind us. Also it has built-in On Star capability.
Now we're really going to benefit from our camera, is when we're backing up. Because we don't want to run into a pedestrian, our backup camera is going to keep everyone safe. Now our camera is only going to come on when we put it in reverse. When we're driving it'll look like this, or when it's in park. But when I put it into reverse, the monitor will come on and we'll be able to see what's behind us.Now our camera is going to give us some guidelines so that we can have a general idea of how close things are.
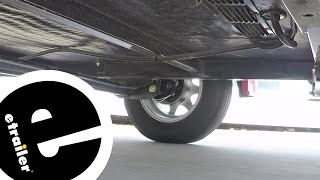
It's also going to feature a remote, that way we can cycle through all our settings and fine tune anything that we may want to. The camera in our system, we just chose to mount it to the back of our bumper. Now you can mount this anywhere, and it does have adjustability so you can get that perfect angle of viewing that you may need. The camera is weatherproof so it will stand up to the elements being at the back of our bumper here, and it does have built-in night vision to help us be safe when backing up even in dark conditions. Now that we've gone over some of the features, let's show you how we get the camera installed.
To begin our installation we're going to need to remove our rear view mirror because our monitor is going to be replacing it.If we come to the base of our mirror we're going to see that there's a fastener or a set screw. That's going to be a T-20 torque spit, and in our kit they do provide us an Allen key with a torque spit on the end to tighten up our new mirror, but it will fit our old factory mirror as well. We're going to loosen it up enough until we can slide it off. Once we have the screw removed we're going to come and pay attention to our harness that's coming to the back of our mirror. There's going to be a button right here, so we're going to push in on that button, we push in on that button, it'll release it and we can pull it out.
With that removed we can go to the very top, if we squeeze in on either side we can slide that cover down and slide it out of the way. We can take our mirror and slide it upwards, and it'll come right off. Now on our new mirror, that's going to be our monitor, as I mentioned we're going to have another set screw.We're going to want to make sure that's nice and loose, you don't want it to be falling out, but you want it to be nice and loose so you can slide it over the button on your windshield. Now we can take our mount and making sure it's facing the right way, we're going to go over the button on the windshield and we're going to slide it into place. You want to make sure that the tab grab it and it slides all the way into place. Give it a gentle tug to make sure it's in position, and then we can go ahead and tighten up that set screw again. You don't want to go super crazy tightening it, you just want it nice and snug so the mirror's not going to come off. Now the harness we unplugged from our mirror, that's going to be for our On Star. Our new mirror does come with On Star capability, and we're going to match up the plugs, then we can plug it in. You want to make sure it locks into place.Our On Star wiring I'm going to leave out and loose right now just so we can get the rest of everything in place. The other end is going to be for our camera cable and we're going to start routing this towards the edge of our headliner here, towards the driver side. We're just going to tuck it up underneath the headliner, then start working towards the edge of the driver side. You want to leave this end exposed, just so we can get the other end attached. The harness that we're going to be attaching to our monitor is going to have the same end on it as the monitor itself. But, on the other end we're going to have a few


Информация по комментариям в разработке