Click for more info and reviews of this CURT Trailer Hitch:
https://www.etrailer.com/Trailer-Hitc...
https://www.etrailer.com
Don’t forget to subscribe!
/ etrailertv
Full transcript: https://www.etrailer.com/tv-install-t...
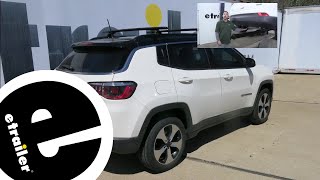
Ryan: Hey everybody, Ryan here at etrailer.com. Today on our 2009 Porsche Cayenne, we're going to be taking a look at and showing you how to install the Curt Class III 2 Inch Trailer Hitch Receiver. Now, one thing I really like about this hitch is that for the most part it is completely hidden. Really, the only thing you're going to see is a receiver tube. It's going to blend in nicely, and help maintain that factory appearance.Now, these Cayennes are built to be very versatile vehicles, and that's what's great about this hitch. Say if you're going to use it for a bike rack, it's going to give you plenty of clearance and not have any issues, but it's not going to stick out so far that it's going to be annoying and you might bump your leg into it when you're getting stuff in and out of the hatch.Now some of the Cayenne owners are actually going to plan on doing some light duty towing, and this hitch is going to be good for that too.
It has some impressive weight capacities, and it's going to be a good all-around choice. The maximum tongue weight rating of our hitch is going to be 600 pounds. That's the amount of weight pushing down on the hitch. Now that's a pretty high number, so you should have no problem getting three, four, or even five bikes on the back of your Porsche.Now, the maximum gross trailer weight rating, that's going to be 6,000 pounds. So the amount of weight that's pulling on our hitch.
So that's the weight of your trailer, plus anything you might be carrying on it. Now it is always a good idea to check with your owners manual to make sure your Porsche can pull that much weight.Now something I do want to point out and that you should keep in mind for all non-trailer loads, Curt does recommend the use of a stabilizing strap, and if you need one of those, you can find it on etrailer.com.Now this is a class III hitch, so it's going to utilize that two inch by two inch receiver tube opening, and have a reinforced collar for extra strength. It is going to use and have the standard five eighth size pinhole, which a pin and clip does not come included, but you can pick one up on etrailer.com.One of the things I'm not too crazy about is how the safety chain openings are. They're kind of tucked back a little bit, and hard to get to, but they do offer just enough room to use just about any size hook, but I'm going to give you a couple of measurements. You're going to use these to determine which hitch mount accessories to use.
From the ground to the top of the edge of the receiver tube opening is about 18 1/2 inches. You're going to use that to figure out whether you need to get a ball mount with a drop or a rise. From the center of the hitch pinhole, to the edge of our rear bumper, that's about two inches. You're going to use that measurement to figure out if any folding accessories you might have can be stored in the upright position without contacting the bumper.Now, some of our customers said they had a little bit of trouble with the installation, such as a trimming, and a couple of other things. We're going to go over all that information during our install.
Speaking of which, let's go ahead and do that together now.To begin our installation, we're going to be working in our wheel wells. We'll start on the driver's side first. Now, in the wheel well, we're going to have four T25 Torx bit screws that we're going to have to remove. Three along the edge, and then one on the side. Right here at where the bumper meets the fender, we're going to pull our wheel well down little bit, and then there will actually be a T25 screw in there that we'll have to take out.Now we're going to need to remove our taillights. To do that, you just open up your hatch, and on the side of your lights you're going to notice two small circles. Now these are actually caps that we're going to have to pop off to expose the fastener beneath. So I'm using a pick to do that, you can just use a flathead screwdriver too. Going to pry underneath there, just pull out like that. Now beneath it is going to be a five millimeter hex head bolt, and just pop those out.Now with both of our screws removed, our light is loose. What I did, I actually just used some painter's tape just to help protect your paint from this light bouncing around. Now to get it out there's going to be a little ball and socket that is actually keeping the lens connected, so you're going to have to wiggle it and pull outward on it. And another technique, what you can do is just take the palm of your hand, kind of hold the light in place, and get it to pop out like that. This is what the ball and socket looks like.So with the light


Информация по комментариям в разработке