Click for more info and reviews of this Stealth Hitches Trailer Hitch:
https://www.etrailer.com/Trailer-Hitc...
https://www.etrailer.com
Don’t forget to subscribe!
/ etrailertv
Full transcript: https://www.etrailer.com/tv-install-s...
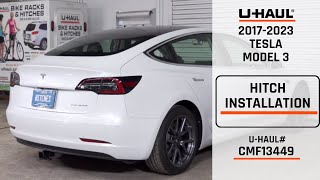
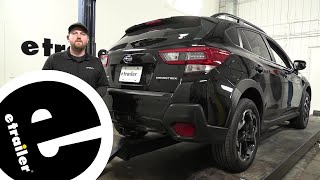
Hello, neighbors. It's Brad here at etrailer. And today, we're taking a look and installing the Stealth Hitch rack receiver on a 2022 Tesla Model 3. So it is installed on this vehicle, and you may say, "Where" Well, and that's kinda the beauty of the Stealth Hitch. It lives up through its name of being rather stealthy, and that is achieved by having a removable receiver tube opening. So in order to get your receiver tube open and put on your vehicle so that way you can actually have your accessories loaded up, on this 2022, there is an access panel here.
Now, there's gonna be two little flathead, little turn plastic screws here. Pretty easily just quarter turn these, and then our panel drops out. And then, from here, you kinda just slide these tabs out. Once this is out of the way, you can see the opening. Now, also, you'll be able to see there's a handle on our passenger side, and that's gonna be able to actually disengage this once it's in place.
And you have a lock here as well, so once it's in place, no one's gonna walk away with the receiver tube opening when it's in it's locked position. And when you're ready to go for a bike ride or load up your cargo carrier, it's pretty easy. You'll have this that comes with the actual receiver rack, and you're gonna see not for towing. Now, this one in particular is meant for just your accessories and has a tongue weight of 350 pounds. So you're able to load up a decent amount with bikes or a cargo carrier, but as far as towing, there is a tow package available.
So if that's something that you would like, by all means. Now, pretty easy here, just kinda give this a quick push up, and you should here a clunk. And now, we have this in place, so we can load up your accessories and be ready to go. It also has a nice opening here for your hitch pin and clip. This is gonna be a 5/8 standard size.
Now, it does not come with a hitch pin and clip. A lot of your accessories that you buy will generally have them, but if you need one or you want a locking one to keep your accessories locked onto this, we have a wide variety of those here available at etrailer. Now, one thing that you may notice is this does stick down a little bit past the car where the factory was before the tube was there. So you do have a ground clearance here of right at about eight inches. So it's relatively low and that's something you're gonna wanna keep in mind is your accessories loaded up tend to stick out a little bit. So some of 'em will have a raised shank, but if it is a flat one and you have things loaded up, when you're going up hills, you're gonna wanna make sure that, that doesn't bottom out. Or if you're going off some maybe not so smooth pavement or some paths or whatever it may be, keep that in mind. And also, you're gonna wanna keep in mind that you are adding length to the overall of the vehicle. Well, and also with this, we're gonna measure that just so you can kinda check your own accessories. Now, keep in mind, we're gonna measure here from the furthest point on our rear fascia to the receiver tube opening. You are gonna be adding some little bit of length to your vehicle and roughly about two inches from the furthest point on the rear fascia. So you're adding that little bit of extra, so just be aware of any curbs or anything like that. But you're also gonna be adding accessories to this, so overall length of the vehicle is gonna change. So just keep that in mind. That way, you're not making contact and damaging your accessories. Now, as far as the installation goes, I will admit it's not exactly the easiest installation because you are gonna have to remove the rear fascia and also the bumper support and some brackets there. Now, none of it's too terribly bad, but sometimes taking off the fascia can be a little bit scary. But I'm gonna walk you through every single step, and that way I'm there to walk you through it, and you can kinda get an understanding of what you're getting into. And really, this is a great option for a hitch because it is very clean-looking. So I would say that it's totally worth it to do the install. So let's take a look at that now. To begin our installation, we're gonna start by opening up the trunk as we're gonna need to gain access to the taillight area as well as some buttoned-up pieces in there, and because we are gonna have to remove the rear fascia in order to get this hitch on. So let's open up the trunk and get to work. So on the driver side, we're gonna find a plastic rivet. It's just a push button one. Now, it's kinda tucked up in there a little bit, so getting a flathead screwd


Информация по комментариям в разработке