Click for more info and reviews of this etrailer Trailer Hitch:
https://www.etrailer.com/Trailer-Hitc...
https://www.etrailer.com
Don’t forget to subscribe!
/ etrailertv
Full transcript: https://www.etrailer.com/tv-install-e...
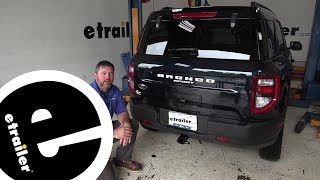
Hey everyone, it's Trevor with etrailer. Today we're gonna be doing an overview and installation of the Etrailer Class III Trailer Hitch on the back of our 2023 GMC terrain. Now if you're looking at getting a trailer hitch, you're probably looking to do one of the three things. Either get a cargo carrier to give you some extra space to have some extra cargo on a long trip or take some or a bike rack to take some bikes to a trail head or even potentially towing, say a small boat or a small utility trailer. Now those would be great options for you and since this is a two by two as well, this gives you a lot of options for accessories and it will fit standard 5/8" pin and if you don't have one, you can pick one up here at etrailer. We also have a lot that come with accessories as well.
And if you are looking to tow, you'll always happy to know that a clevis hook fits on here perfectly. So we already know the S hook is gonna fit on here, no problem at all. Now it has a nice durable matte black powder coating on the outside of it and it's rated for 675 pounds of tongue weight and 4,500 pounds of gross trailer weight. Now as for our ground clearance, we're looking at 11 inches from the ground to the top of our receiver tube. And good thing to note is as soon as you put weight in here, it's gonna start to sag down.
So you actually lose some ground clearance whenever you have something in your trailer hitch. And from the center of the hitch pin hole to the outside bumper, we're looking at about 3-1/2". So you shouldn't have to worry about putting anything in your trailer hitch and with it bumping the back of our vehicle. Now the install process isn't too bad on this vehicle. You will have to enlarge a couple of the holes in the frame rails and if that part scares you a little bit, you can always go and use our dealer locator tool and find a shop near you that'd be able to do it for you.
But if I've convinced you to go ahead and maybe give this a try for yourself, we can go ahead and jump into the installation. To begin our installation, we're gonna take a T15 torque bit and we're gonna remove the two Torx screws on our bumper here. (tool buzzes) You have one here and then another one here. You can tell which one it is, just based off these little tabs that are kind of sticking out behind it. Once we got those loosened up, we'll remove lower the exhaust there.
With our 15 millimeter so I can remove these two bolts here. We got the weld nuts on the back, that bolt head up here on the front, it's gonna be a little tricky to get to so. (tool buzzes) Now before we fully lower our exhaust and what we're gonna do is take our cam buckle strap and we're gonna find a spot to place it so that it holds up our exhaust once it's lowered. And if you're at home, you can also use like a block of wood, a box, whatever you got laying around to help you hold this exhaust up to prevent any damage further along the line. Now before we get this removed, I always like to take a little bit of silicone and just spray around. We're gonna be removing this rubber isolator, it just helps break it free. Once we got it sprayed down though, you can take any fry tool and kind of take it and put it behind and push forward. And if you find a good spot for leverage like on the back of this, you can use that to kinda help you out with that. But once that's off, you can just set that off to the side and then we're ready to lower the exhaust down. And whenever you're ready to lower your exhaust, these brackets where we pulled those 60 millimeter bolts out, they're gonna have a tab way up top. So what you'll have to do is lift up and kind of shimmy this forward a little bit to get it off that tab. And once you have it off, you can just rotate around and then we will kind of work it past our rear fascia here and you'll want to kind of loosen up whatever you got holding up the exhaust while you do this so that it comes down nice and smooth. And if you have this wiring harness here, you can see on the backside there's a little push pin. All you need to do is take trim panel tool or a flathead screwdriver and reach back there and pop that loose. You'll also wanna do it to this section here as well. Now once we got that outta the way, we can go ahead and enlarge our holes and start feeding our hardware through. As you can see, it's just barely too small to fit our hardware up into the frame, so we're probably just gonna enlarge it a little bit both ways and see how it fits up from there. Now to enlarge it, I'm gonna be using a


Информация по комментариям в разработке