Click for more info and reviews of this CURT Trailer Hitch:
https://www.etrailer.com/Trailer-Hitc...
https://www.etrailer.com
Don’t forget to subscribe!
/ etrailertv
Full transcript: https://www.etrailer.com/tv-install-c...
Hey everyone. Shane here with etrailer.com. Today I have a 2021 Ford Bronco Sport, and I wanna walk through how to install the Curt Class three trailer hitch receiver. Adding a hitch receiver on your vehicle is gonna give you a lot of different options. Maybe you wanna pull a trailer. Maybe you have bikes that you're tired of loading inside the vehicle.
Then you wanna add a bike rack, but you don't wanna put a bike rack up on your roof. Maybe you wanna put a cargo carrier on it, 'cause you wanna get some items from inside the vehicle put 'em outside, and make a little bit more room for your passengers. Adding a class three hitch is gonna give you all those options. We mentioned class three hitch. Two inch by two inch receiver tube opening.
Reinforced collar, gives us a little extra stability there. Hitch pin hole is gonna be 5/8" inch in diameter. Take a standard 5/8" hitch pin. Hitch pin and clip does not come with the hitch, however they can be found here at etrailer. Rolled steel safety chain loop, will accommodate different size safety chain hooks.
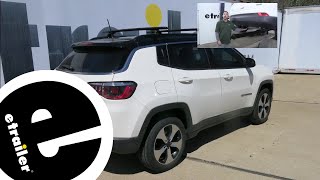
The hitch itself is gonna be a steel construction, very thick black powder coat finish. It's gonna stay lookin' nice for a very long time. As you can see, our receiver tube is completely hidden behind the bumper fascia. The only thing we really see is our receiver tube here. So it's gonna maintain a nice clean look on the vehicle, when we're not hauling anything.
Now I'm gonna give you a few weight capacities and measurements to help you when deciding on any of your hitch mount accessories, like your bike racks, ball mounts, and cargo carriers. From the center of the hitch pin hole to the outermost part of the bumper, is gonna be about four inches. The number's important for any of your hitch mount accessories like your bike racks and cargo carriers, that might fall up against the vehicle. You wanna make sure they're not gonna make contact. From the ground to the top innermost part of our receiver tube, is gonna be about 15 and 1/2 inches. Keep that number in mind for any of your hitch mount accessories that may require a little bit more ground clearance. As far as our weight capacities go, we're gonna have a 525 pound max ton weight, which is a downward pressure on the inside of the receiver tube. When you're loading cargo carrier, bike rack, even a trailer, you wanna make sure you're not exceeding that. Remember 3,500 pound gross trailer weight, which is a trailer plus the load included. I always recommend checking the owners manual of the vehicle. Make sure the vehicle can withstand that amount of weight. You're gonna go with the lowest number between the vehicle and the hitch. Now that we've gone over some of the features, we'll walk through how to get it installed. To start our installation we're gonna take seven millimeter socket. We're gonna remove the four bolts, the ones right across the bottom of our fascia. Next we're gonna take a strap and you can really hang it from anywhere. I like hanging it from the springs, 'cause it's easy. We're gonna run it underneath our exhaust pipe, and we'll tighten that up. Now we're gonna remove our exhaust. Around two isolators right back here, we're gonna use a 10 millimeter socket to remove those. We're gonna have one right up in the center, and we're gonna use a pry bar to get that one off. 10 millimeter socket, that'll go up here. Same thing on this side. You're gonna have a nut, with some wiring that's connected to it. Pull that wiring down. And then we'll remove the bolt holding the exhaust up. I got one here in the center. That'd be a good idea if you spray the end of it down with some lubricant. Soapy water works great as well. We can take some channel locks. And we can just push that up. Now we'll slowly lower our strap, to give us room to work on our frame rails. There are three holes we're gonna be using. One of them is underneath our wheel-well panel, right up under here. You'll see this extra piece here. That's on our frame rail. You can either cut that off, remove the two fasteners, or shove it up next to your frame rail up here. Trim panel tool, flathead screwdriver. Remove push pin fastener here. And then we'll remove this guy here. I'm actually not going to cut it, and I'm just gonna take it like this. And we'll tuck it right up next to the frame rail. We're gonna be using these three holes. And we're gonna feed our hardware through this hole. Can be a little bit trying to get your hardware through there. I'm gonna show you how to do it. If you want to make it easier, you can always, kinda shave that side a little bit or shave one of the sides a little bi


Информация по комментариям в разработке