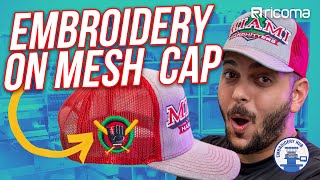
This week on Embroidery Hub, Willy shows us how to make patches and how to adhere them to caps using two different methods: embroidery and heat pressing. He’ll also go over each method’s advantages to help you decide which one is best for your custom apparel business.
Facebook Embroidery & Custom Apparel Mastery Group: / embroiderymastery
To learn more schedule a virtual demo today: https://ricoma.com/US/virtual-demo
Get our latest Ricoma embroidery YouTube videos sent straight to your Facebook Messenger: https://manychat.com/l2/RiCOMA.us
To learn more about our embroidery machines, visit our website: https://ricoma.com/
Take a look at our cap heat press here: https://shop.ricoma.com/collections/h...
Watch all of these videos to see how we embroider on caps: • Cap Embroidery w/ 3D Puff Border & ST... • Embroidering Small Letters On Caps | ...
Check out the MT-1501: https://ricoma.com/US/machine/mt-1501
Watch all of these videos to see similar patch projects: • Embroidered IRON-ON PATCH Tutorial | ... • Patches embroidered out of TRASHBAGS!...
• Embroidery Hub Ep. 40: Custom Embroid... • Embroidery Hub Ep. 32: How to Attach ...
Learn more about on the KS-810: https://shop.ricoma.com/products/ks-810
Check out our digitizing software, Chroma: https://shop.ricoma.com/products/chroma
Get designs on Hoopmade: https://hoopmade.com
See how we hoop a cap in this video: • RICHARDSON CAPS 3D Puff Embroidery Ch...
If you need help installing a cap driver, click here: https://ricoma.com/US/tech-support
For this project, we used:
HP-0408FC cap heat press
MT-1501
An Otto cap
75 by 11 needle
60 weight thread
E hoop
Fabric or cutaway stabilizer
Adhesive sheet
Teflon sheet
Regular scissors
Small curved scissors
Lighter
Adhesive spray or tape
Let’s discuss profit potential:
For the heat transfer method, you need an adhesive sheet that costs around $3.99 a yard and a cutaway stabilizer for $7.99 a yard. You also need a cap that usually costs $3.50, but they are cheaper if you buy them wholesale. So, your initial investment is $15.48. Because you can sell these caps for $25 and up, your profits should be $9.52. And remember, you can make multiple patches from the materials you have bought.
For the embroidery method, your initial investment would be $7.49, and if you sell the cap for $25, you’ll make a profit of $17.51.
When deciding between the two methods, it’s important to know that sewing the patch to the cap is more time consuming, but the patch will stay on longer. While with the heat transfer method, it’s a lot quicker to do, but the patch may fall off with time.
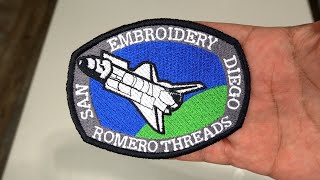
Now let’s make the patches. Hoop a piece of fabric and put it into the machine. Press File to choose your design. If you want to do two patches, choose the option to multiply your design, input two, and press OK. Make sure to give 70mm of space between the patches. Now choose the E hoop and press OK. Then, choose your color sequence, and press OK. Next, center the design, lock the machine, and press the trace button. Run the design at 1000 stitches per minute and press Start. Once the machine finishes, cut out the patches and use a lighter to burn any loose threads.
For the embroidery method, we first need to digitize the trace stitch, tack down stitch, and run stitch onto a circle file. Make the border wider by raising the pull and push compensation option to 130%. This will lower the potential for errors when aligning the patch to the trace stitch. When embroidering a patch, remember that it may get smaller, so make the trace stitch and the tack down stitch smaller than the border. With the digitizing done, go to File, choose the circle file, and press OK. Next, select the cap hoop and choose the color steps for the trace stitch and the tack down stitch. Put a frameout option on the first step so you can place the patch down. Center the cap by making sure needle #1 goes over the cap’s middle seam, then press Start. Place the patch on the cap after the trace stitch is done and press Start to do the tack down stitch.
For the heat press method, set the heat press to 380 degrees Fahrenheit for 30 seconds. Put the fabric on top of the pad to protect it from the adhesive. Place the patch face down and put the adhesive sheet on the patch. Close the heat press. Once it’s done, let the patch cool down to peel off the adhesive sheet. Now, place the cap on the heat press, put the patch on top of the cap, and place the Teflon over the patch. Press for 30 seconds at 380 degrees Fahrenheit.
And that's it! You can now adhere patches onto caps using a heat press and an embroidery machine. They each have their pros and cons, so it’s up to you to decide which one is best for you.


Информация по комментариям в разработке