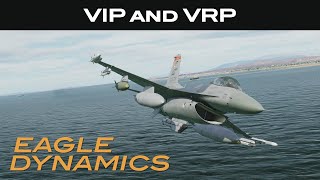
In this DCS: F-16C Viper video, we’ll look at new features coming to the datalink capabilities of our Viper. As many of you already now, data linked flight members are limited to the same four-ship group as set in the Mission Editor. With this update, it will now be based on the Fighter Channel and the Source Track Number, or STN. This will allow you to set aircraft outside a group to your Team of aircraft 1 to 8 and even change this while in a mission. You can also set up to four donors, but those must be set prior to mission start. Let’s get started.
Let’s start in the Mission Editor to see how we now set up the Viper’s datalink. When selecting an F-16C Block 50 Airplane Group, you will now have an additional tab called datalinks. We’ve also added some new functionality to the Aircraft Additional Properties tab that we’ll look at first.
Along the bottom, we now have three new items under Datalink. The Voice Callsign Label, Voice Callsign Number, and STN are identifiers used when setting up the network. You will probably want to set the Voice Label and Voice Callsign Number to match each aircraft’s callsign. It’s important that each STN be unique within a Fighter Channel and the STN must be entered as an octal, i.e., only values of 0 to 7 are valid.
The Tactical Net Datalink, TNDL, tab as two sub-tabs, one for Settings and one for Network.
The Settings sub-tab allows you to set the Fighter Channel that the network will reside on, but for the time being, these are fixed to just channel 1 within the Mission Editor. In all but the massive missions possible, you can keep this on Fighter Channel 1. You can also keep the Mission Channel for C2 control and Special Channel for HTS functions to 1. The Voice Callsign is auto filled from the Aircraft Additional Properties tab, and if the aircraft is to be the Team leader, check the Flight Lead radio button. The Transmit Power determines the broadcast range.
The Network sub-tab is the meat of setting up the network. The top portion lists up to eight Team members that can exchange data and target assignments over the datalink. Although these can be assigned in the Mission Editor, they can also be edited while in flight. We’ll examine this a bit later. Along the left side of the team member number that is auto assigned and to the right is the Time Difference of Arrival (TDOA) assignment check box. This will determine Team members participating in the HARM Targeting System, HTS, TDOA group. This will be the subject of the next video. To the right of that is the Pilot Name and to the right of that is the Voice Callsign Label and Voice Callsign Number that we discussed earlier. Next is the member’s STN number. The rightmost column can be selected to remove a member from the Team.
If you have open Member slots in the Team list, you can add an entire Group or add an individual aircraft.
Below the Team Member list is the Donor list that can have up to four aircraft. Note that these must be assigned prior to flight; they cannot be viewed or edited once in the cockpit. Like the Members list, each row displays an aircraft with its Member number, Pilot Name, Callsign, STN, and delete option. As donors cannot take part in a TDOA team, there is no column for it. Also like the Members, you can add Groups and individual units to the list.
What is also very important to note is that any aircraft with a TNDL STN can be added to the Member or Donor network, not just other F-16s.
We’ll get in the air now and look at this in action.
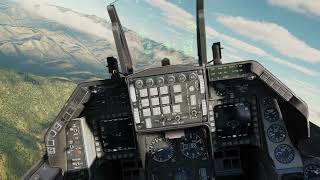
To view our datalink settings, select LIST from the ICP, then Enter for DLNK, and dobber right once. Here we can see that our Fighter Channel is set to channel 1, our Mission Channel is set to Channel 1, and our Special Channel is set to 1. On the right side we can see our callsign, first and last letter of Viper and the number of 11. We can also see that we are the Flight Leader and the transmit power is set to Medium. Dobber once more to the right.
Much of this will look familiar from the Mission Editor. We can see our Member Number of 1 to 8, a “T” if the member is assigned to the TDOA team, and the STN. We’ll talk about TDOA in a later video.
Looking at the HSD, we can see our flight of four aircraft around us with their Member Number in blue. To the left are Team members 5 to 8, also in blue with Member Number. To the right are the four Donors, marked as green with a center dot. Ahead of us are four aircraft not in our network.
Let’s look at an example of changing a Team member assignment; in this case, moving a Donor to Team Member 8. To do so, we’ll first Dobber down until we select the STN of Member 8. Now, we’ll enter the STN of a donor aircraft, in this case, 00304. Upon pressing enter, Member 4 is my Team Member 8.
I hope you enjoyed this explanation of expanded datalink functionality for the Viper and recognize it as a major advancement for DCS in general.


Информация по комментариям в разработке