Welcome to my channel, Matt's Metalworking. Please don't forget to hit that LIKE button and SUBSCRIBE for future videos. My name is Matt and I produce metalworking relating videos which can include fabrication, machining, milling, turning, welding, tool tutorials, etc.
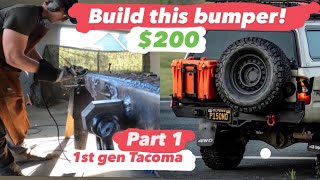
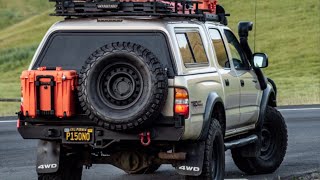
In this video I will be showing you how to fabricate a custom tube bumper. The bumper on the rear of this Tacoma has seen better days, a new aftermarket non chrome replacement is over $250, I built this for under $75 in materials plus time.
Toyota Tacoma bumper removal tutorial: • How to Remove the Rear Bumper and Hit...
To start, I have a piece of 2x6 steel tubing, 3/16” thickness. I would have preferred 1/8” but this is all they had in stock and this is rather a large step up compared to the factory chrome bumper which is 1/16” thick at best. The total width is 54 1/8” , thankfully the metal supplier I purchase my materials from cut the ends square so there’s no need to make any adjustments. I also have some 1/4” channel for the license plate area and this will get cut down, one flange will be removed, and it’ll get squared up.
Spray paint was used to mark out my cut areas so my scriber lines are easier to see. Triangular sections were cut from the ends so the bottom edge could be folded in. The one cut will run a 1/4” in from the bottom edge for a total length of 10”. Making another cut line over on the outside edge, then meeting at the intersection point. This addition line is 1 1/4” above the 1/4” line. These portions will be bent into place using a torch with clamps.
The channel’s flange was cut off and the channel was cut to size using the license plate cover as a reference. This channel is 1/4” thick so there’s no need for welding on nuts on the rear or installing nutserts.
Centering up the channel with the bumper, this will help determine my cuts for the recesses license plate area. Filler plates will also be cut out from the same 3/16” steel for the openings beside the license plate area, first is making cardboard templates and then transferring the shape over on metal.
Any spots which will be welded had the rust, paint, and mill scale removed using a cup wire wheel on an angle grinder. To weld, I’m using a flux core mig welder equipped with 0.035 wire. A magnet and clamps are used to help hold any pieces into place, first, they’re tacked and then everything is solid welded. All welds are ground flush using an angle grinder equipped with a grinding disk.
Due to the Tacoma’s oddly shaped box edges behind the bumper, the ends of the tubing will be folded in slightly. A 1/4” of the material was removed and the total cut length measuring from the outside edge was 6”. Those portions were then welded into place and end caps were also installed.
Holes that were drilled were for the license plate lights, wiring, drain holes, and license plate mounting holes. The license plate mounting holes were also threaded.
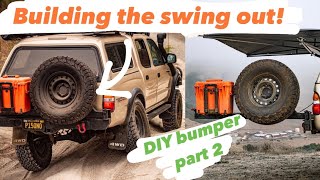
Finally, the bumper brackets were installed, the factory brackets were cleaned up and cut to size. Gussets were also used to help strengthen those brackets.
Paint, rust, and mill scale were removed using a muriatic mixture. Due to flash rusting, this was removed using a wire wheel on an angle grinder. The surface was sanded down using 320 grit sandpaper and the bumper was cleaned using a wax and grease remover.
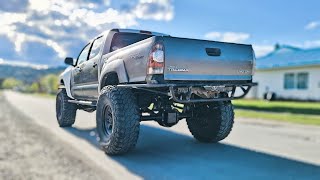
The bumper had an etching primer applied, the rear has a farm implement paint applied and the front used a textured box liner spray. Once dry, led lights were installed for the license plate and had weatherproof connectors installed. The factory truck wiring was cleaned up using zip ties, the factory license plate light connectors were cut off and had weatherproof connectors installed.
Installing the bumper into place, tighten the bolts and it's officially done.


Информация по комментариям в разработке