Welcome to my channel, Matt's Metalworking. Please don't forget to hit that LIKE button and SUBSCRIBE for future videos. My name is Matt and I produce metalworking relating videos which can include fabrication, machining, milling, turning, welding, tool tutorials, etc.
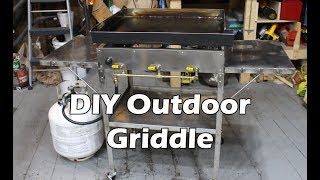
In this video I will be showing you have to make your very own dual zone BBQ burner. From what I’ve found, some of those off the shelf burners don’t last very long. At $60 new for a BBQ burner locally and not even lasting two years, it’s quite the waste in my opinion. Once these burned get to a certain stage, they basically fall apart.
Ideally it’s best to make this out of stainless steel, but unfortunately my fluxcore welder doesn’t work on stainless steel, so instead I am using mild steel.
Used for the burner is 1 inch by 3 inch tubing, 1/8 inch thick and 15” long. I tried to roughly match the existing dimensions of the old burner.
Cut this tubing in half using a cutting disk on the angle grinder. The pieces are within a 1/16” of an inch and I can easily square them up with a grinding disk or file. I’m also cleaning up any burrs so I don’t risk cutting myself after. Clamp the piece together and square them up using a grinder or file.
Spraying the work pieces in a marking paint, then mark out the holes using a scriber. Next is marking out the holes on the sides of the tubing. There will be two rows of holes, each row is 3/8” away from the top and bottom portion of the tubing, therefore a 1/4” from each other. Then the holes are spaced a 1/2” apart. Each row is also staggered by a 1/4”.
The holes will be 3/32” in size. If possible from what I’ve found a 1/16” hole would probably be better. However I have found it’s a bit tough with this drill press as it doesn’t have an overly high rpm speed.
I picked the correct sized drill bit needed for the feed lines, this was based off the gasket size which you’ll see a further on in the video. With a larger bit, a slower speed is needed and cutting fluid is a must. Being that this is a bigger bit, there is a greater chance of the piece grabbing where you can possibly hurt yourself. So it’s best to clamp the work piece down.
Once those main holes were made, I made a square center line and then marked out the holes where the feed tube screws on, basing it off the gasket. These holes are based off the self taping screws I’ll be using. Some models of self taping screws can drill their own holes, however I prefer to drill a pilot hole. This allows for easier installation and prevents them from wandering.
For the caps, this was made out of 1/8” sheet metal. Using the bench grinder, I sized up the caps, there was 3 caps in total.
Where the burner meets in the center, a chamfer is applied to the end of the tube to help with welding penetration. The metal does need to be cleaned to remove any contaminants which may cause imperfections in the welds.
Using an abrasive pad on the grinder, again I went over the areas I will be welding so the surface is properly prepped. The end caps get installed. They do fit reasonably tight so they won’t move while welding and everything is squared up accordingly.
Tack welding the caps into place on opposite ends. When welding, due to the excessive heat, parts can pull or warp causing distortions in your work piece. Those tack welding will need to be cleaned up using a wire brush. I’m using a fluxcore mig welder, so slag is present and needs to be removed when applying new welds.
Running full beads now. I’m using a small hobby welder which only has a high and low heat setting. This is thicker steel and to ensure I have proper penetration, the highest heat setting is used. The wire is 0.035” in thickness. Clean those welds up using a wire brush. An anti splatter spray can also be used to keep the piece a little clean.
Connecting the two separate burners, I have a scrap piece of tubing kicking around, the one side is missing which makes it a great jig to keep this burner square.
The welds can be cleaned up with an angle grinder and flap wheel or grinding disk. Then the welds are inspected and any low areas are filled. After those legs have been welded in place, due to the irregular shaped bottom on the BBQ, I have rounded off the ends so it sits a little more secure. Install the propane feed tubes with gaskets.
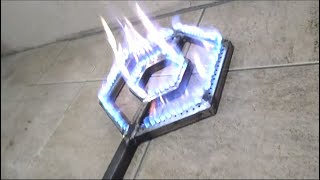
The update as to how it cooks food, I couldn’t be more happier with it. I have found if I keep the lid closed it does maintain a fixed temperature better. Just to give you a view with the infrared meter. As kind of a warp up of what I learned, smaller holes will definitely give you a finer flame. With the thicker steel, it does hold heat extremely well and despite having less holes, the heat output seems to be better. So far we’ve been using it to cook hot dogs, burgers, and steaks which excellent results.


Информация по комментариям в разработке