Click for more info and reviews of this Dexter Trailer Brakes:
https://www.etrailer.com/Trailer-Brak...
Check out some similar Trailer Brakes options:
https://www.etrailer.com/dept-pg-Trai...
https://www.etrailer.com
Don’t forget to subscribe!
/ etrailertv
Full transcript: https://www.etrailer.com/tv-review-de...
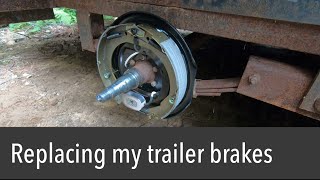
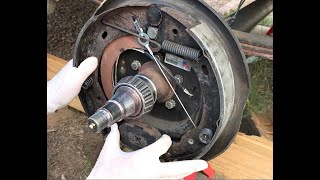
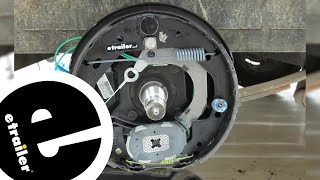
Ryan: How's it going Ryan here at etrailer.com. Today, we're going to be taking a look at and showing you how to install the Dexter Axle trailer brakes in conjunction with the Dexter Axle trailer hubs and drums. Many times, trailer maintenance is often overlooked or even forgot about. That's because your trailer will sit for a while. Then you go to use it and realize something's not working just right.Well, just like a vehicle the trailer brakes over time are going to get some wear and tear and need a little bit of attention and the ones here that we replace today are a perfect example of that. The shoes, the brake shoes, are wearing really thin.
Sometimes they can even get cracks in them. The whole component itself is just showing some age, getting really rusty and they're just not going to perform like they should and the main advantage these have over your standard style brake assemblies is that these are going to require very little maintenance. Since they are the never adjust, you're not going to have to worry about coming in behind your backing plate and adjusting your brakes. That way you know your pads are going to wear down evenly and provide you with maximum stopping power.Since these are electric brakes, you are going to need a brake controller and your towing vehicle to activate them and if you don't have a brake controller or you're looking for a new one, there's plenty to choose from here at etrailer.com. These are going to have a 7,000 pound axle rating.
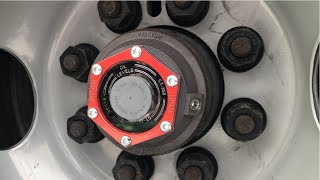
They're also going to have a five bolt mounting flange and they're going to fit 14 and a half up to 16-inch wheels. Once you get your hands on these, you're going to be able to tell that they're really heavy duty and just really well made and since they are preassembled, they're going to be really easy to install and whenever you do replace your brake assembly, it's never a bad idea to also replace the hub and drum assembly.In this case here, we are using the Dexter. Now, right away, you're going to be able to tell it's really well built and heavy duty and one of the things that kind of separates this one from some of the other ones is the size of the studs. Now, these are actually 5/8 in diameter, so they're a little bit thicker and then in our customer's case he uses his trailer to the maximum capacity and he was actually having some issues with the smaller 9/16 style studs breaking and just giving them some trouble. So not only is he getting better braking performance, but he's also more or less getting an upgrade and in the size of his wheel studs and these are just going to be a little more heavy duty.Now what's cool too is that the hubs are actually going to come included with the correct size lug nuts.
So that's going to be one less thing you're going to have to worry about picking up. Now these are going to work with 12 inch electric and hydraulic brake assemblies. They're also going to have an eight by six and a half bolt pattern and that bolt pattern's good to know. That way, you can make sure it'll work with your wheels. Now, there are just a couple of things I would recommend picking up if you don't have already to make the installation little bit easier, one of them being grease because you are going to have to pack your wheel bearings, another one being a cotter pin if that's the type of securing device at your trailer uses.
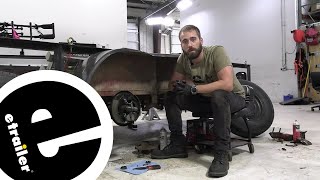
These aren't going to come included with a cotter pin.You can always reuse the old one if you can. But to be on the safe side, if you want to pick one of those up, you can find it here at etrailer.com. Another thing I would recommend is some brake clean. That way you can clean off the back of your drum and make sure everything is nice and clean. Now as far as the installation goes, everything is relatively straightforward. It shouldn't take you a whole lot of time, should I have no problem doing it at home. Speaking of which, let's go ahead and put it on together now. To begin our installation, we're going to be working back here at our wheels. Now something I want to point out, I'm using some lifts to get our trailer way up off the ground just for better inaudible 00:03:53 purposes. However, you don't need lifts to get this job done. Just your regular jack and jack stands will do the trick just fine. But with that being said, we can now go ahead and remove our wheel.Now with the wheel out of the way, what we can do is remove this little cap here and that'll give us access to a nut that'


Информация по комментариям в разработке