Click for more info and reviews of this CURT Trailer Hitch:
https://www.etrailer.com/Trailer-Hitc...
https://www.etrailer.com
Don’t forget to subscribe!
/ etrailertv
Full transcript: https://www.etrailer.com/tv-install-t...
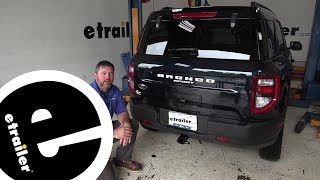
Today on our 2013 Land Rover Evoke we're going to be taking a look at and showing you how to install the Curt class 3 custom fit trailer hitch receiver part number C13128. Here's what our hitch looks like fully installed, and it's going to tuck up nicely behind our fascia and all we're really going to see is our receiver tube opening sticking out. It does have a reinforced collar, giving it a nice, clean look, and it is a class 3, so it's going to be a two inch by two inch receiver tube opening. Now, it is going to use a standard 5/8 pin and clip. It's not included, but you can pick one up on our website using part number PC3. Now, as far as the safety chain loops go, it's going to be a rolled steel stock style, welded to the bottom of the receiver tube. As you can see, we're not going to have any issue getting most sized hooks on or off. Now, our hitch is going to feature a 600 pound tongue weight and a 4,000 pound gross trailer weight rating. Now, I do want to mention you always want to double check your vehicle's owner's manual to make sure it can handle that amount of weight.
Now, whenever you're towing any non-trailer loads, the manufacturer does recommend the use of a stabilization strap. I would like to give you a few measurements to help you when citing for accessories for your new hitch. This is a ball mount, bike rack, or even a cargo carrier. From the center of the hitch pin holes to the outer most edge of the bumper is six inches. Now, from the ground to the inside top edge of the receiver tube opening is 12 and 1/8 inches. Now that we're done with some of these measurements, let's show you how we get installed. To begin our installation, we need to lower our exhaust.
Now, I'm going to put a strap up to help support it so it doesn't completely fall down. On the passenger side, right above our tail pipe, we're going to have one rubber hanger and we're actually going to be removing the bolt that holds the hanger on. The bolt is going to be on the passenger side on the outside of the frame, and we're going to be using a 10 millimeter socket to remove it. Now we can go ahead and rotate the exhaust hanger out of the way for now. Now, directly behind that one we're going to have another one. It's going to have a rubber isolator on it.
I'm going to take a little bit of spray lubricant and that's going to ease us getting those rubber isolators off of the hanger itself. Now, we're going to have another one on the driver side in the same spot. I'll go ahead and remove the hanger from the rubber isolator, and we're going to do the same thing on the other side as well. Now, I'm just going to lower this down a little bit because we are going to need to get in underneath our fascia right here. Now, behind our fascia, right behind our muffler, we're going to have four hex bolts here at the top. We're going to remove those, and we're using a 10 millimeter socket to do that. Now that we have those removed, we're also going to remove the eight torques bit bolts holding our heat shield in place.
Now, I'm using a T30 torch bit to remove these. With bolts removed, I can pull down our heat shield and set it aside for right now. Here in our driver's side, if we come to the very back of the vehicle on the frame rail here we're going to see an oblong hole. Now, this is going to be our access hole and we're going to be putting some hardware in place. We can start by taking our pole wire here. We're going to take this square spacer block from our kit. We're going to slide it over the top and then we can take our half inch carriage bolt and we're going to thread it on to the wire. We're going to push this all the way into the frame, as well as the block, making sure that it goes all the way into the frame, and then we're going to pull our bolt through the spacer block and down through the frame. We're going to leave our pull wire attached for right now. Now, if we look at our instructions, it's going to give us the measurements that we're going to need to cut out of our fascia so our hitch can fit. Now, we're going to need to find the center point and then we're going to measure out from there, and I used some masking tape to help me keep a straight line. I'm going to be using a rotary tool to cut this section out. I do want to mention it's always better to cut smaller and come back and start trimming as necessary that way you don't miss and over cut. Once we get this cut out, we are going to have to come to the back side and remove this support as well. Now, this black section here, if we look up into our fascia, you can see there's a nice straight line there and we can use that as a reference poi


Информация по комментариям в разработке