Click for more info and reviews of this etrailer Trailer Brakes:
https://www.etrailer.com/Accessories-...
Check out some similar Trailer Brakes options:
https://www.etrailer.com/dept-pg-Acce...
https://www.etrailer.com
Don’t forget to subscribe!
/ etrailertv
Full transcript: https://www.etrailer.com/tv-install-a...
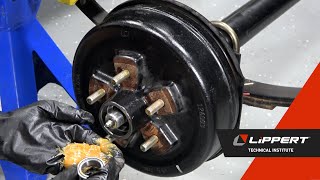
Today in our trailer, we'll be installing the etrailer axle technology electric trailer brake assembly. It's self adjusting for the left hand side for 5200 to 7000 pound axles. It's part number AKEBRK-7L-SA. It's also available as an assembly for the right side, part number AKEBRK-7R-SA. Here's a look at our new brake assembly. As you can see, it's an entire new assembly, new backing plate, new shoes, all new springs, a new self adjuster, and a brand new magnet. This is a quick and easy installation versus just repairing your worn out magnet or your worn out shoes.
Just a matter of unbolting the old one, putting the new one on, and connecting your new wires. It saves you a lot of time, a lot of effort, and money in the long run. Nice thing about this brake assembly that we have here today is the fact that it's self adjusting. Once you do your initial adjustment, once you install it, you don't have to worry about adjusting it every again. It will take care of that for you. All right.
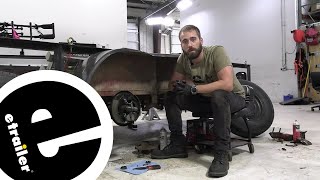
First thing we need to do is take off our tire and wheel assembly. We'll take off our tire, wheel and set it aside. Now we need to take off our grease cap on our hub assembly. Use a screwdriver. I'll just tap it in there to get behind it.
We'll take off our keeper here on our nut. Just pry it off. Then, we can remove our nut. Okay. With our nut removed, we can now remove our hub assembly.
Once our hub assembly is off, we can take off our outer bearing and our spacer washer here and set those aside. We will be replacing our hubs and our bearings, so we don't need to worry about saving any of the bearings or removing the seal. We'll just set this aside and have it out of our way. Now, we'll cut our wires that go to our brake assemblies. Unwrap this so we can see what we're working with here. A little snip back here to get rid of the butt connector. It will have a new one. You can see this isn't a heat shrink butt connector. It's just a standard butt connector. We'll replace them with heat shrink butt connectors, so it will be more weatherproof. Before we get dirty, we're going to need to clean off this grease. Just take a shop towel here and wipe it off our spindle. This really is a good time to inspect your spindle, too, and make sure there is no deep gouging, cracks, or burns on it. Ours is looking pretty clean so far. Now that our spindle is cleaned off, we can remove our brake assembly here. I just want to point out that our brake assembly is covered in brake dust. You want to make sure you're wearing gloves when you're doing this, just because brake dust can be harmful to your health. There's five nuts that hold our brake assembly on to our axle. Okay. With all five of our nuts now removed, we can take our brake assembly, pull it off, and we can discard it. Now we can slide our new assembly on. Make sure we have our wires up and out of the way behind it so they don't get pinched behind our backing plate here. We'll just slide it onto our axle, line up our studs, push it on. You want to make sure your magnet is facing down towards the bottom. If we did it like this, you can see it's no longer on the bottom. We did it like this, it's off to the side. You want to have it as close to the bottom as possible. Right there is perfect for our application. We'll take our nuts, and we'll reinstall them. When we tighten these down, we want to make sure we go in a star pattern just like you would when you're tightening down the lug nuts on a wheel. You would do diagonally across, back, down, and then back up. You never want to do two that are next to each other at the same time. Now we're going to torque these down. Again, just like we did with snugging them down, we'll go an alternating pattern. Now that our new brake assembly has been torqued down, we can make our electrical connection to the existing wires on the trailer. Because trailer brakes utilize a magnet, it doesn't matter which wire goes to where. I'll take our existing wires here, strip back some insulation, take two heat shrink butt connectors. We have these available on our website if you need to purchase them. Install them onto the wire, and we'll crimp it down into position. Since these are a smaller diameter gauge wire, what I like to do is fold the wire back in half on itself like that, so it's a little bit thicker. Then, we can crimp it down into our connector. Now, we'll take our heat gun, and we'll shrink our butt connectors. Okay. With these heat shrink butt connectors now he


Информация по комментариям в разработке